Faculty Documentation: How to Create Your Course Site
This video includes:
- Creating your own site through the worksite setup tool.
- Associating your roster with the new course site and publishing it.
Best Practices for Course Site Creation (Click to Expand)
Overview
Faculty can create their own courses in iLearn. The self-service creation method removes any lag time you experienced waiting for your course to be created. In addition, this process removes the need for a roster association; when you create your site, your roster is automatically added. This document provides detailed instructions for accessing the Worksite Setup tool and using it to create your iLearn course sites.
Please Note:
1. The Create New Site button is added to the Site button and the profile icon on the top red banner area for quick access.
2. Unpublished sites can be published with a single click. The button cannot be missed! See description on the next page.
Steps for Creating New Course Sites
Step 1: Access the Site Creation/Worksite Setup tool
When you log in to iLearn, you have three ways to access the “Create New Site” button:
1. Click Sites at the top right of the page, and you will see the Create New Site button.

2. On the top right corner, click the profile icon, and you will see the Create New Site button, or
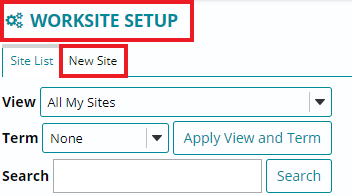
3. You can also go to your Home Page, then click Worksite Setup tool on the left menu and then click New Site button.
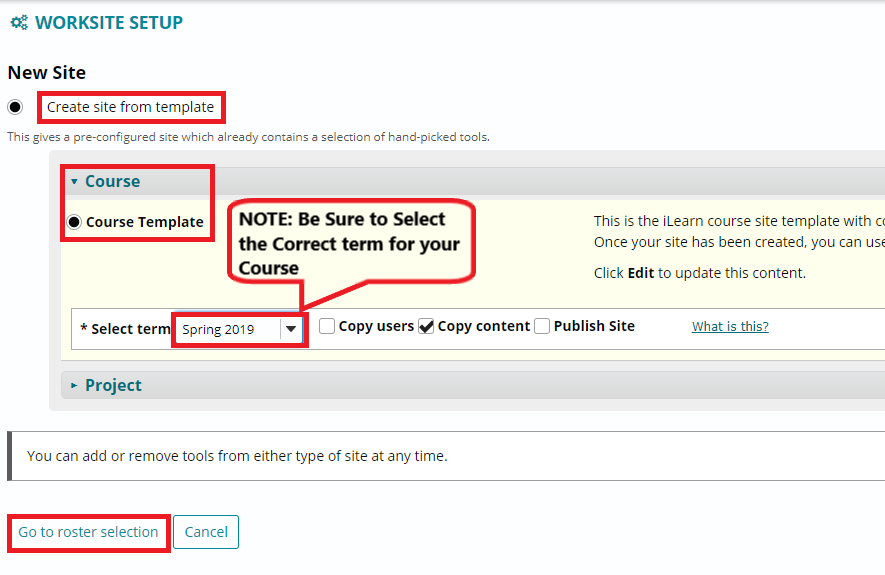
Step 2: Select your template and term
Choose Create Site from template and then choose Course Template and term.
1. Click Course and at the drop down select Course Template
2. Select the appropriate term
3. Check the box for Copy Content (optional)
4. Click Go to roster selection at the bottom
NOTE: If you do not see your term listed, the site creation process is not yet available for this term.
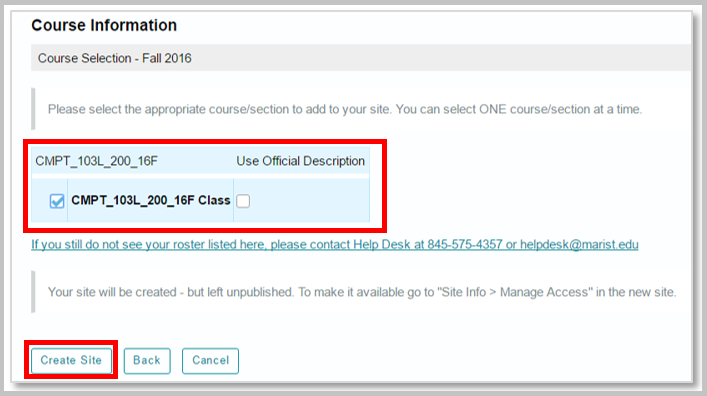
Step 3: Select your course roster
On the next screen, choose a course from your list of available courses. By selecting a course, you are creating and automatically populating the course with its roster. Once you choose a course, click Create Site to complete this process.
NOTE: You may create one course at a time.
Step 4: Notification of the new site will show up on the top of the page

NOTE: You may publish the site right away. We recommend you update content in the site before publishing it.
You will see the course site listed under the Sites icon on the top right corner of the iLearn interface. Go to Sites to make it your favorite site.
Step 5: Publish your course
Your course will be created with the roster automatically populated. However, students will not have access to the course materials until you publish your course. To publish your course, simply click the Publish Now button in the top yellow bar in your course.

REMINDER: You can also change your course status by clicking on Site Info -> Manage Access.