Student Documentation: Embedding Images into the Discussion
Overview:
This document explains how to upload images into the student's Resources tool and the two main ways that can be used by the students to embed a picture in their discussion.
Uploading Images into Resources Tool:
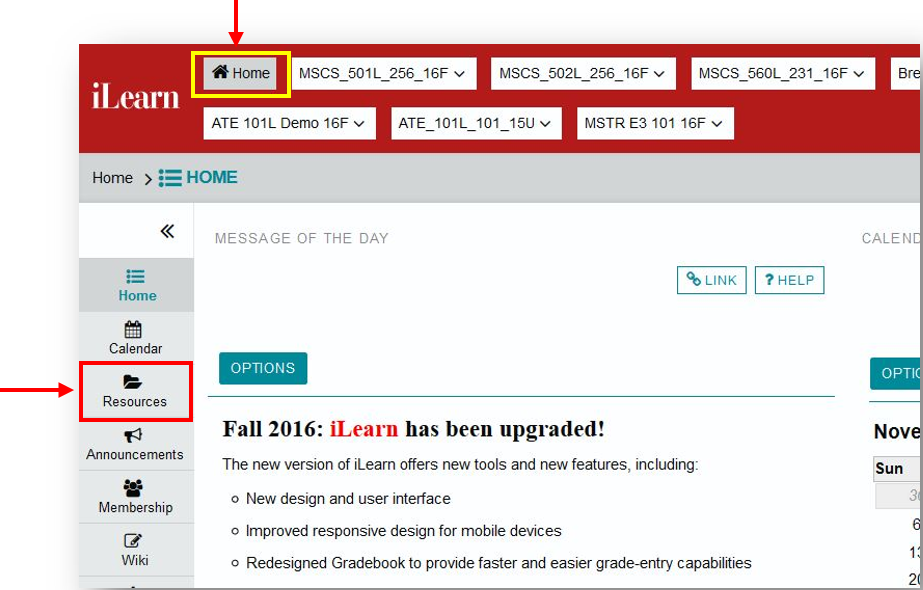
Step 1: Click on Home and go to Resources tool.
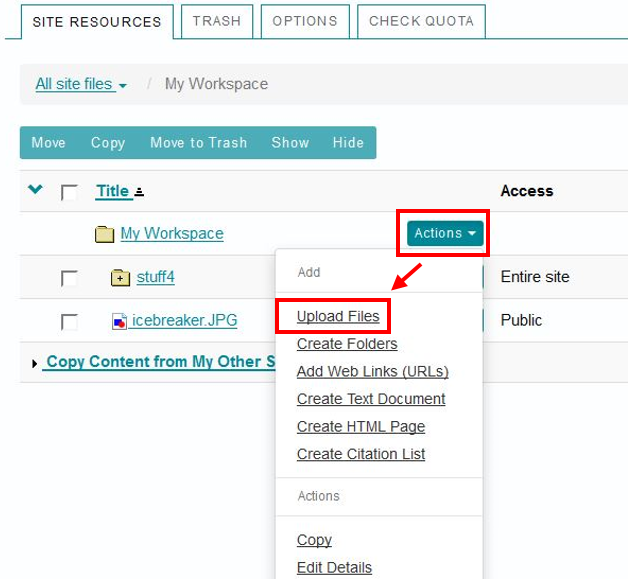
Step 2: Click on Actions and select Upload Files.
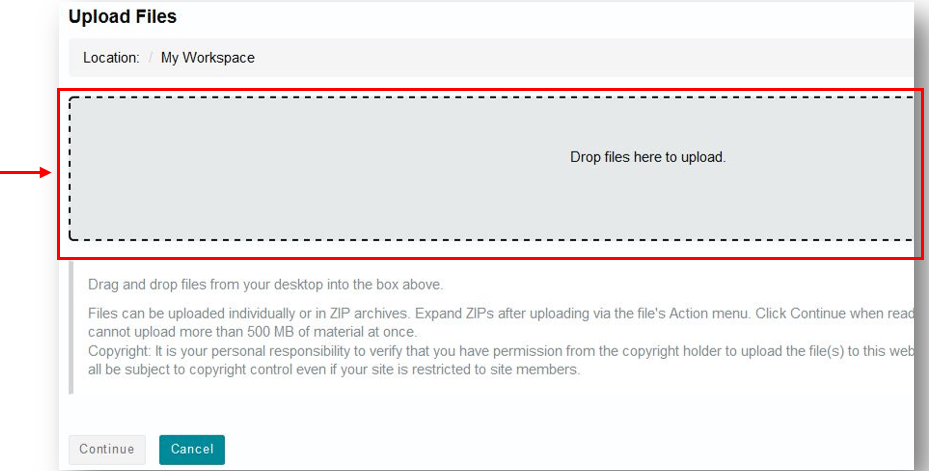
Step 3: Drag and drop the images from your computer into the space provided.
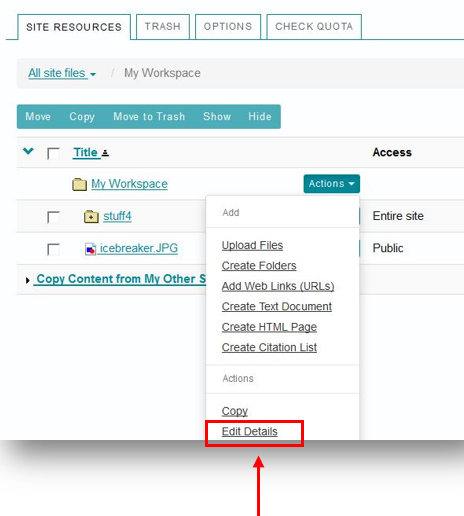
Changing the access of the uploaded files to Public:
Step 1: Click on Actions and go to Edit Details.
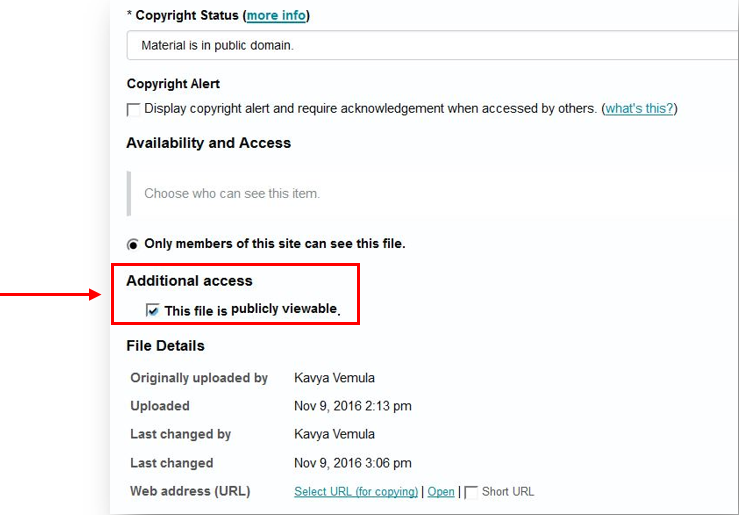
Step 2: Under the "Additional access" tab, there is a checkbox named "This file is publicly viewable". When this field is checked, the item will be visible to everyone.
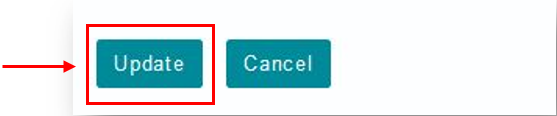
Step 3: Click on Update to save the changes.