Student Documentation: Discussions and Rich Text Editor
This video includes:
- How to start a new conversation for a Discussion Topic.
- How to reply for other students' posts.
Student : Discussions Tool. (Click to Expand)
The Discussions tool is the online discussion board for the course. You can access the Discussions tool in the left-hand toolbar in your iLearn course site.
You can access the Discussions tool in the left-hand toolbar in your iLearn course site.

It is critical to understand the organization of this tool.
DISCUSSION - Represents the top level of the discussion hierarchy and can be thought of as the room you might reserve to hold a discussion.
TOPIC - Represents the mid- level in the discussion hierarchy and can be thought of as the questions your professor would write on the board for the group to discuss.
CONVERSATION - Represents the lower-level of the discussion hierarchy and would represent the conversations that take place around each topic. Click a Topic to access the Conversations within it.
To Participate in a Discussion on iLearn. (Click to Expand)
1. Go to your desired course site on iLearn.
2. Click Discussions in the left-hand toolbar.

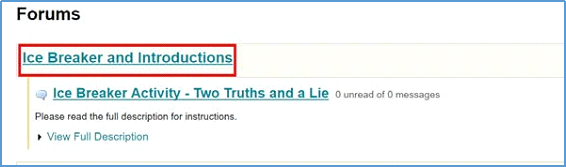
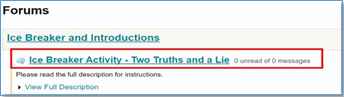
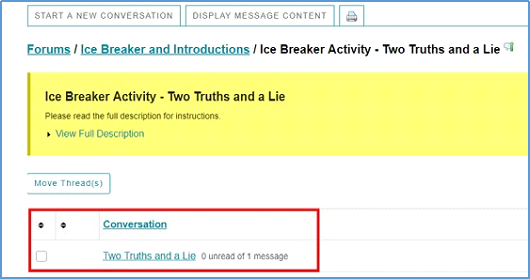
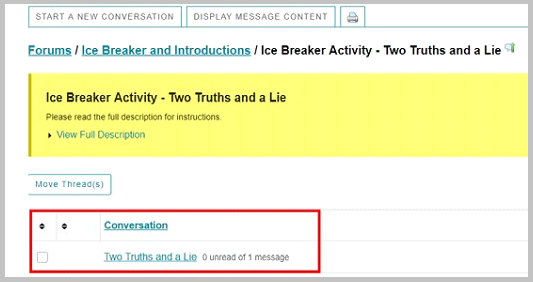
3. Find the appropriate Discussion (Ice Breaker and Introductions) and Topic (Ice Breaker Activity- Two Truths and a Lie) you would like to participate in.

Under each Discussion, you can:
a) See the number of unread and total number of messages in each topic.
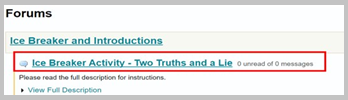
b) Click View Full Description to view a description and any instructions your instructor may give you for each topic.
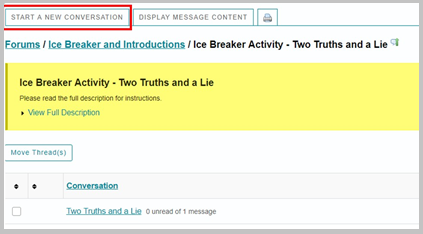
4. Click the Topic in which you would like to participate.
5. Click Start a New Conversation to respond to the Topic.
6. Begin responding to the Topic through your conversation. As you respond to the Topic by creating a new Conversation, you can:
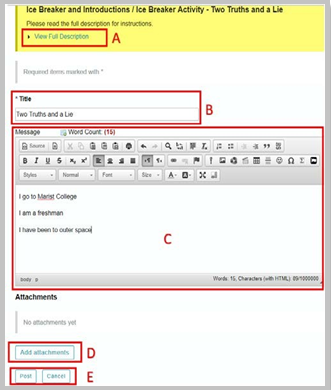
a. Click View Full Description to view your instructor's description and instructions for the Topic.
b. Add a title for your Conversation. It should be relevant to the Topic.
c. Add text to your Conversation and utilize the Marist iLearn Rich Text Editor.
(See Student Communication through the iLearn Rich Text Editor for
further information.)
d. Add attachments to your Conversation. (See Adding Attachments in the iLearn Discussions Tool for further information.)
e. Save or Cancel your Conversation.
Replying to a Conversation in the iLearn Discussions Tool. (Click to Expand)
Sometimes, your instructor will require you to respond to the Conversations of your classmates. This allows you to share your thinking with others, as well as further develop your own answers and idea.
1. Go to your desired course site on iLearn.
2. Click Discussions in the left-hand toolbar.

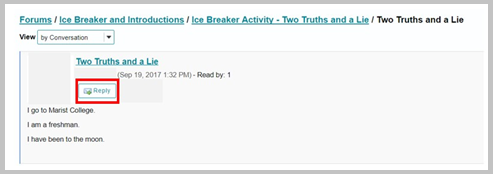
3. Find the appropriate discussion and click the topic you would like to participate in.
4. Click a Conversation to view and respond to it.
5. Click Reply.
6. As you are replying to the Conversation of another classmate, you can:
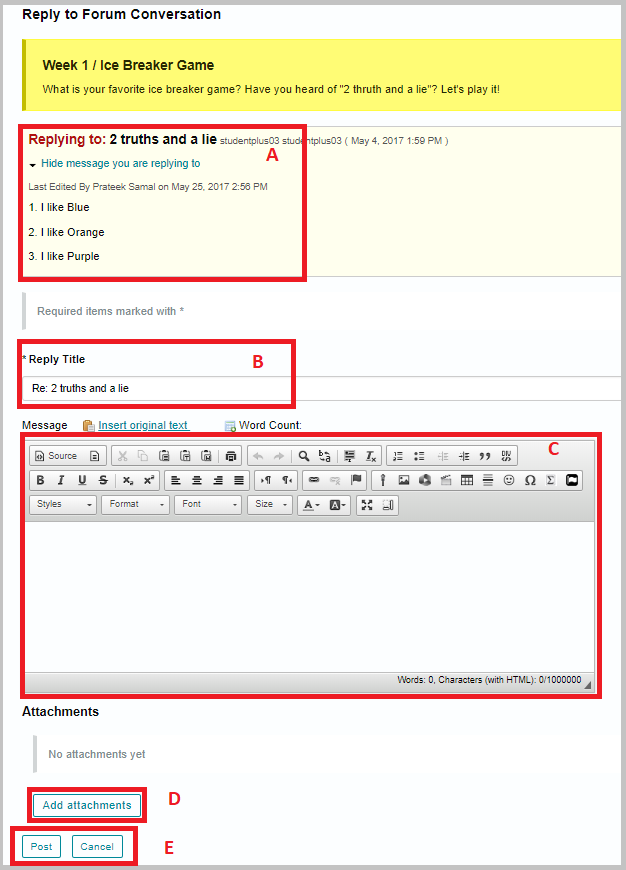
a) View what you are replying to.
b) Revise the title of your reply.
c) Add text to your Reply and utilize the Marist iLearn Rich Text Editor.
(See Student Communication through the iLearn Rich Text Editor at the end of this document for further information.)
d) Add attachments to your Reply. (See Adding Attachments in the iLearn Discussions Tool at the end of this document for further information.)
e) Save or Cancel your Reply.
Adding Attachments in the iLearn Discussions Tool. (Click to Expand)
When starting a new Conversation in a Topic or replying to the Conversation of a classmate, you can add attachments, such as documents or images.
Follow this process whenever you want to add an attachment to a Conversation in the iLearn Discussions tool.
Assuming you are Starting a New Conversation or Replying to the Conversation of a classmate,
1. Click Add Attachments.
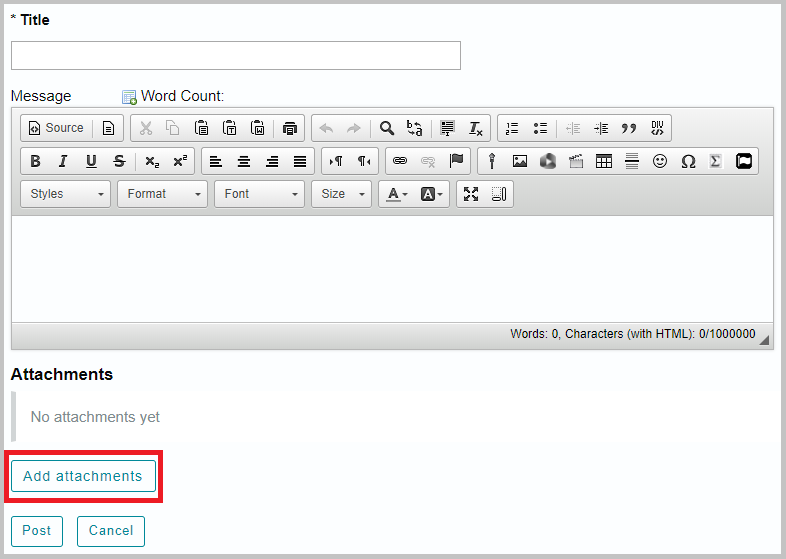
2. Select an attachment to add from:
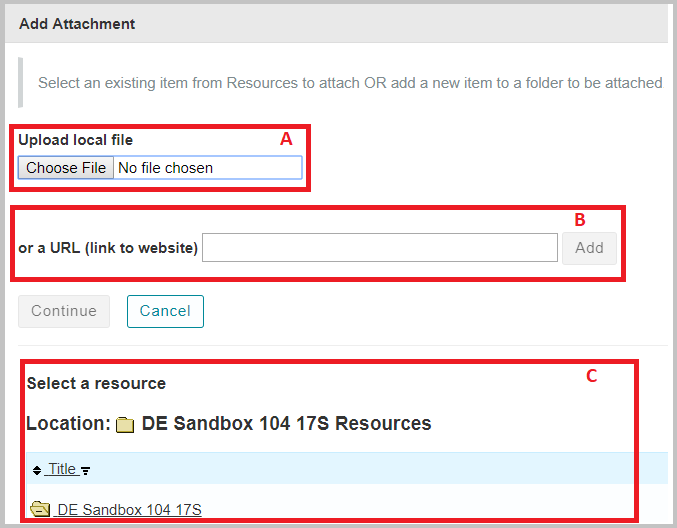
a) Your computer
b) A web address
c) Resources already in iLearn in your current course site, your other course sites, or My Workplace
3. Click Continue after you make your selection to add your attachment to your Conversation or Reply.

Student Communication through the iLearn Rich Text Editor. (Click to Expand)
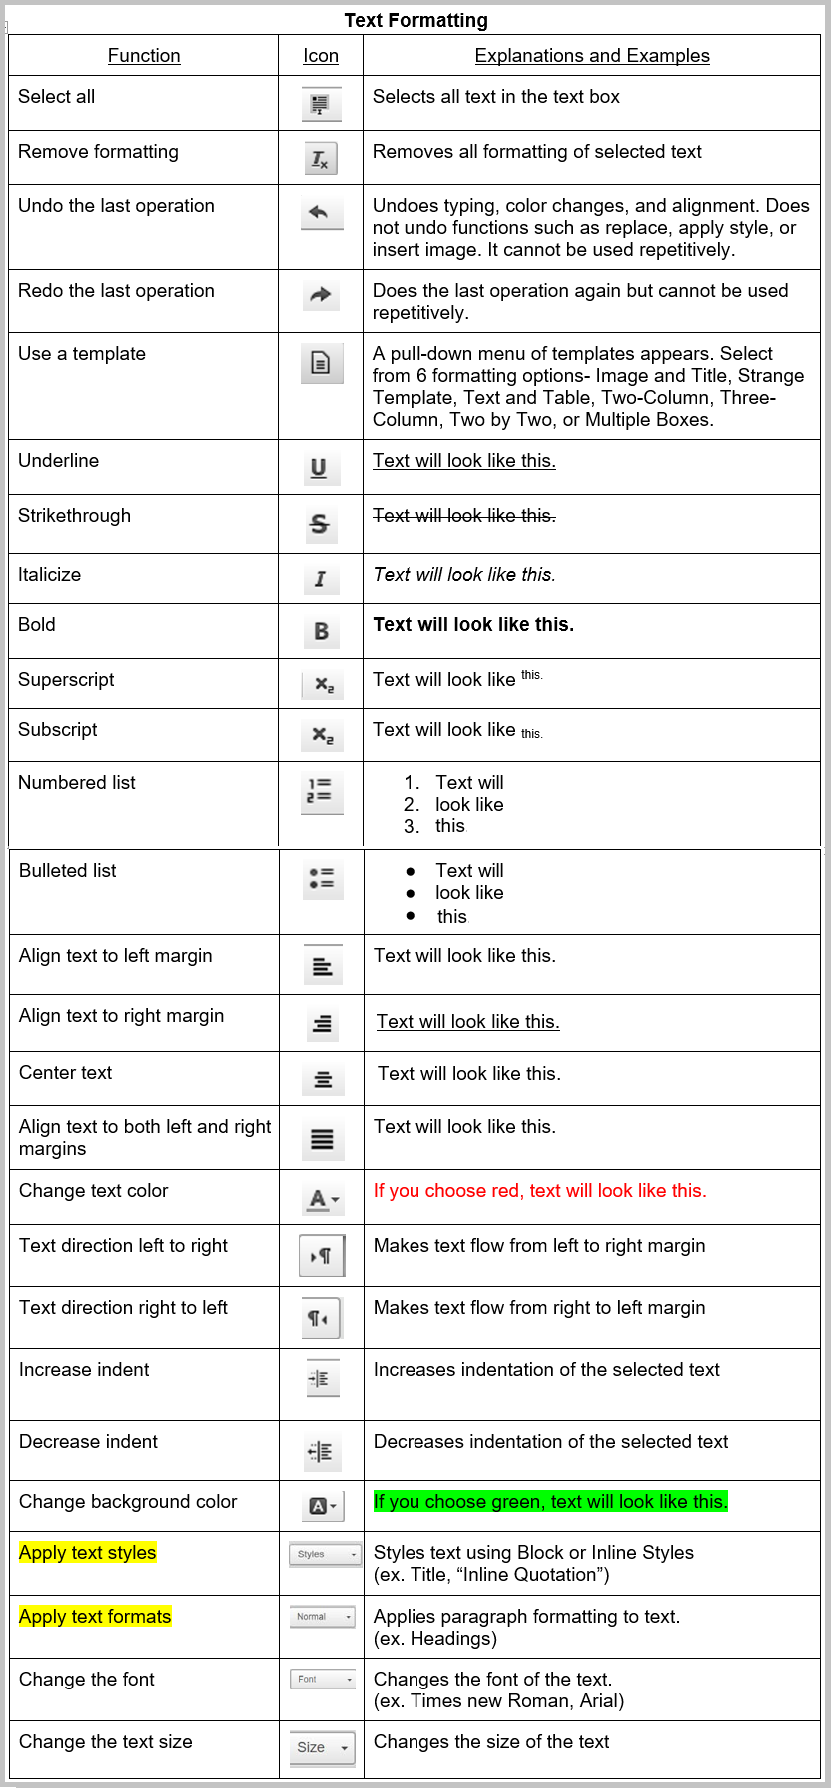
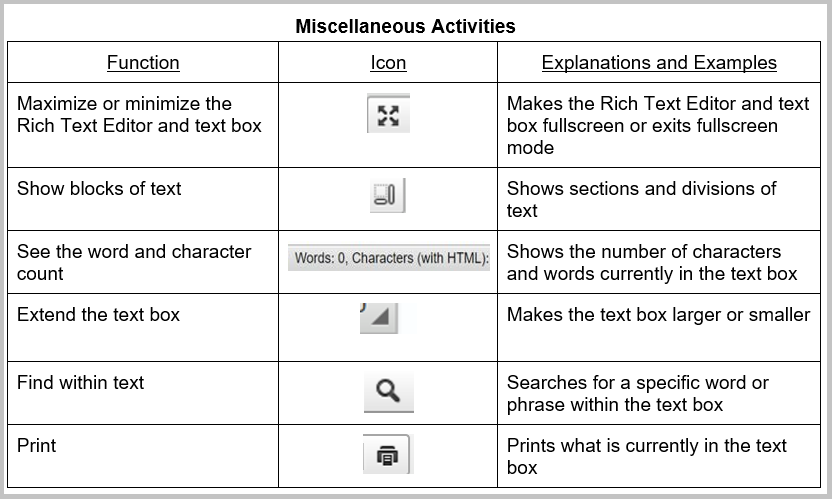
Many pages in iLearn contain large text-entry boxes along with many icons and drop-down lists located above the actual text entry area. This makes up what is known as the Rich Text Editor. Most of the tools in iLearn use the Rich Text Editor. This is a valuable tool that can help you enhance the formatting of the content you create and submit in iLearn.

In this documentation, you will find an explanation of the most commonly used Rich Text Editor functions and a complete table that lists each function. Each function the table has its corresponding button and an explanation or example of how the function edits the text.
Commonly Used Icons in the iLearn Rich Text Editor. (Click to Expand)
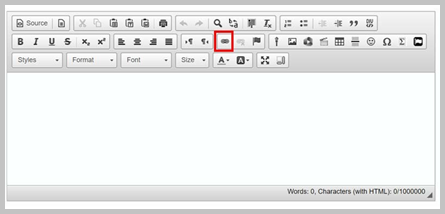
Insert Link
Use the Insert Link button  to hyperlink a word or phrase in the Rich Text Editor text box to a web address.
1. Type your desired text into the Rich Text Editor text box.
2. Highlight the text you wish to hyperlink.
3. Select the Insert Link button in the Rich Text Editor.
4. Type or paste the URL you wish to link the text to and click OK.
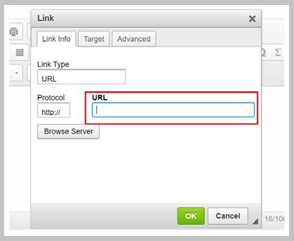
Please note that the link will not be active until you formally submit your work. You cannot test the link while editing.
Detailed List of Rich Text Editor Buttons and Their Functions. (Click to Expand)
1. Below, you will find a complete list of the Rich Text Editor function. Each function has its corresponding button and an explanation or example of how the function edits the text.
2. If a word in the Rich Text Editor text box is underlined in red, spell-checking is suggested.
3. If a button in the Rich Text Editor is faded, you cannot perform that function in the iLearn tool you are currently using.
4. Hover over each button in the Rich Text Editor to view its function.