Faculty Documentation: Best Practices for Using the Syllabus Tool
Overview
The Syllabus tool allows you to create a multi-part syllabus. It is another way to organize your syllabus content. The Syllabus Tool has several benefits:
-
Instructor can easily edit or remove individual items in the Syllabus without downloading the whole document.
-
A collapsible/expandable menu is automatically created for all Syllabus items.
-
All individual items can have open/close dates so that they can be released progressively over a semester.
-
Syllabus items can be added one by one, or in bulk.
-
Students can view the Syllabus without downloading the whole document each time or using WORD or PDF applications.
Recommendations for Using Syllabus Tool
TIP #1: If you copy and paste your Syllabus into one section of the upgraded Syllabus tool, it will appear as one page. This will mimic the look and feel of the previous Syllabus tool.
TIP #2: You can attach your Syllabus document as you have been able to do previously in iLearn.
TIP #3: If you import from a course designed prior to the July 2014 upgrade, it will import as a one page syllabus.
Creating a Syllabus
Method 1: Adding Items One by One
1. Click the Syllabus tool on the left navigation bar when you are in your course site.
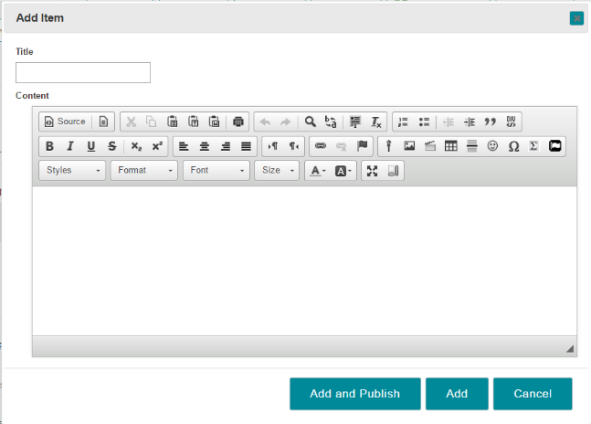
2. Click Add Item on the top menu bar.
3. In the pop-up window, add a title for this item. You will see a Rich Text Editor box pop up. You can add text as you normally would.
4. When you are done adding text or attaching documents, you can click Add or Add and Publish.
5. Next, you will be able to add start and end dates. Click on the Click to add start date and Click to add end date text to enter dates.

6. If you did not publish the syllabus initially (selected Add, rather than Add and Publish), click the button pictured below (that looks similar to a lightbulb) to publish the syllabus and make it visible to students.

7. Click Add Item again to add another item and repeat the steps above.
Method 2: Adding Items in Bulk
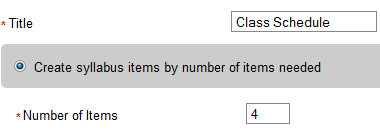
1. Click Bulk Add button on the top menu of the Syllabus tool.
2. To add items by number, add a categorical title and the number of items you want, and then click Post.
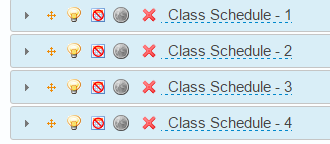
3. You will see all the items with a number attached to each of them.
4. To add items by dates, add a categorical title and then fill out the details underneath, and then click Post.
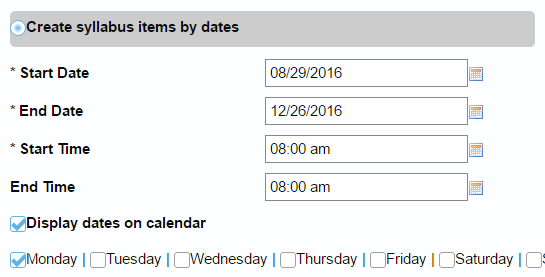
5. You will see all the items added with a number attached to each of them and the date added automatically.

6. When all the items are added, you can then edit them as you like.
Managing the Syllabus
Method 1: Edit Items One by One
When all the items are added in the syllabus, you can click the icons of one item to reorder, publish, change dates, and edit content.
| Symbol | Description |
  |
Collapse/ expand items |
 |
Drag to reorder items |
 |
Publish items |
 |
Add to Calendar |
 |
Publicly viewable to the whole world |
 |
Delete an item |
 |
Change item title |
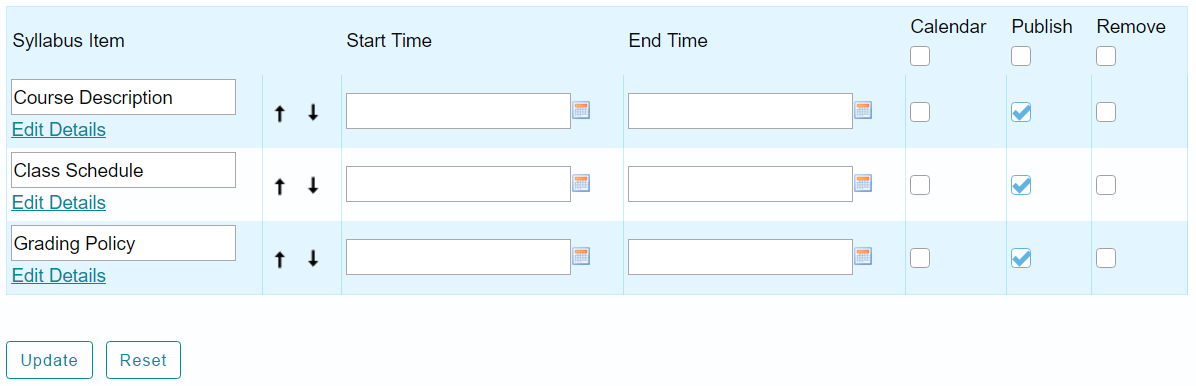
Method 2: Edit All/Many Items in Bulk
You may edit all items or many of them at one time by clicking the Bulk Edit button. You can change titles, dates, add the item to calendar, publish, and delete the items on one screen. When you are finished, click Update.